|
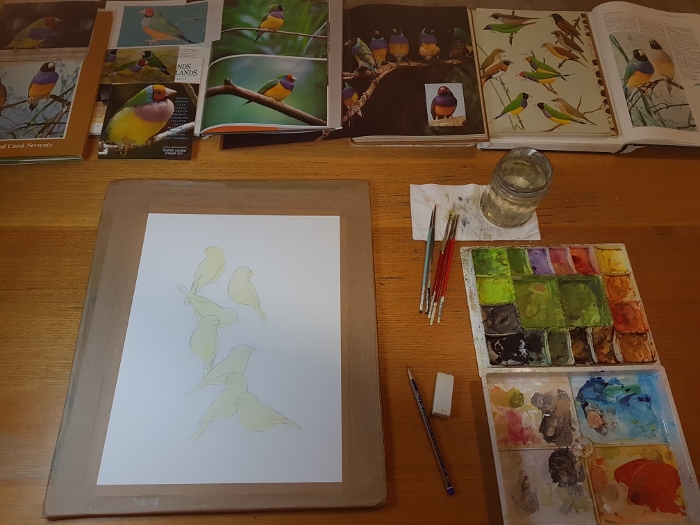
Painting Technique This sequence of photos illustrates the methods, materials
I begin by stretching 300g hot-pressed paper and taping it to a board. Sketches, photos and field notes and guides of my chosen subject are then assembled. Most of this material is subject to copyright and is used for reference only. I am not trying to produce a scientific illustration, but I want my painting to be a reasonably accurate depiction (if an expect notices that a bird does not have the correct number of secondary wing feathers, that’s their problem!) After the initial pencil drawing, I cover the main subjects with masking fluid using an old brush.
Once the masking fluid has dried, the background is airbrushed using pigmented inks and diluted watercolour. Masking is then removed.
Main colours of birds are blocked in using watercolour and gouache. Using a 000 brush, I begin adding detail to the birds, usually working from the top down.
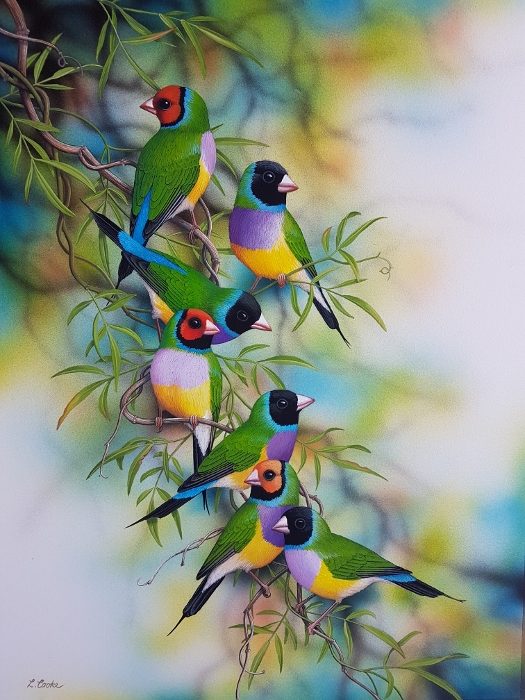
More feathering is added to the birds. Vines are painted so the birds have something to sit on and leaves are painted in using a mid-green.
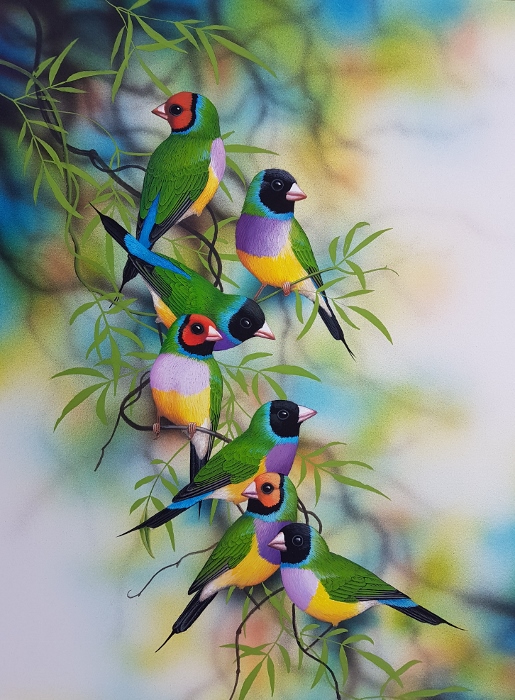
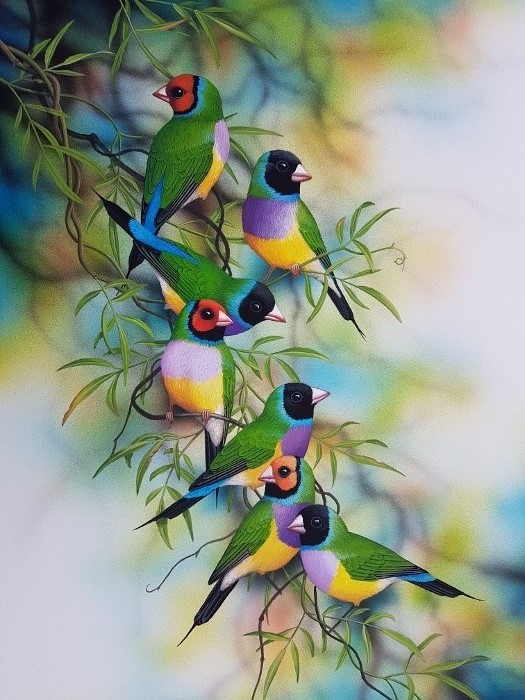
While this looks very similar to the previous photos, many hours have been spent adding detail, especially to the leaves.
All the birds now have feet! Further detail is painted on twigs and birds. Signature added. Painting finished. |
Lyn Cooke Artist
Specializing in Wildlife, Birds, Ballarat Victoria Australia